Software Manual
The robot comes with a software manual that you may find helpful in this week’s adventure. You can find it here
Function List
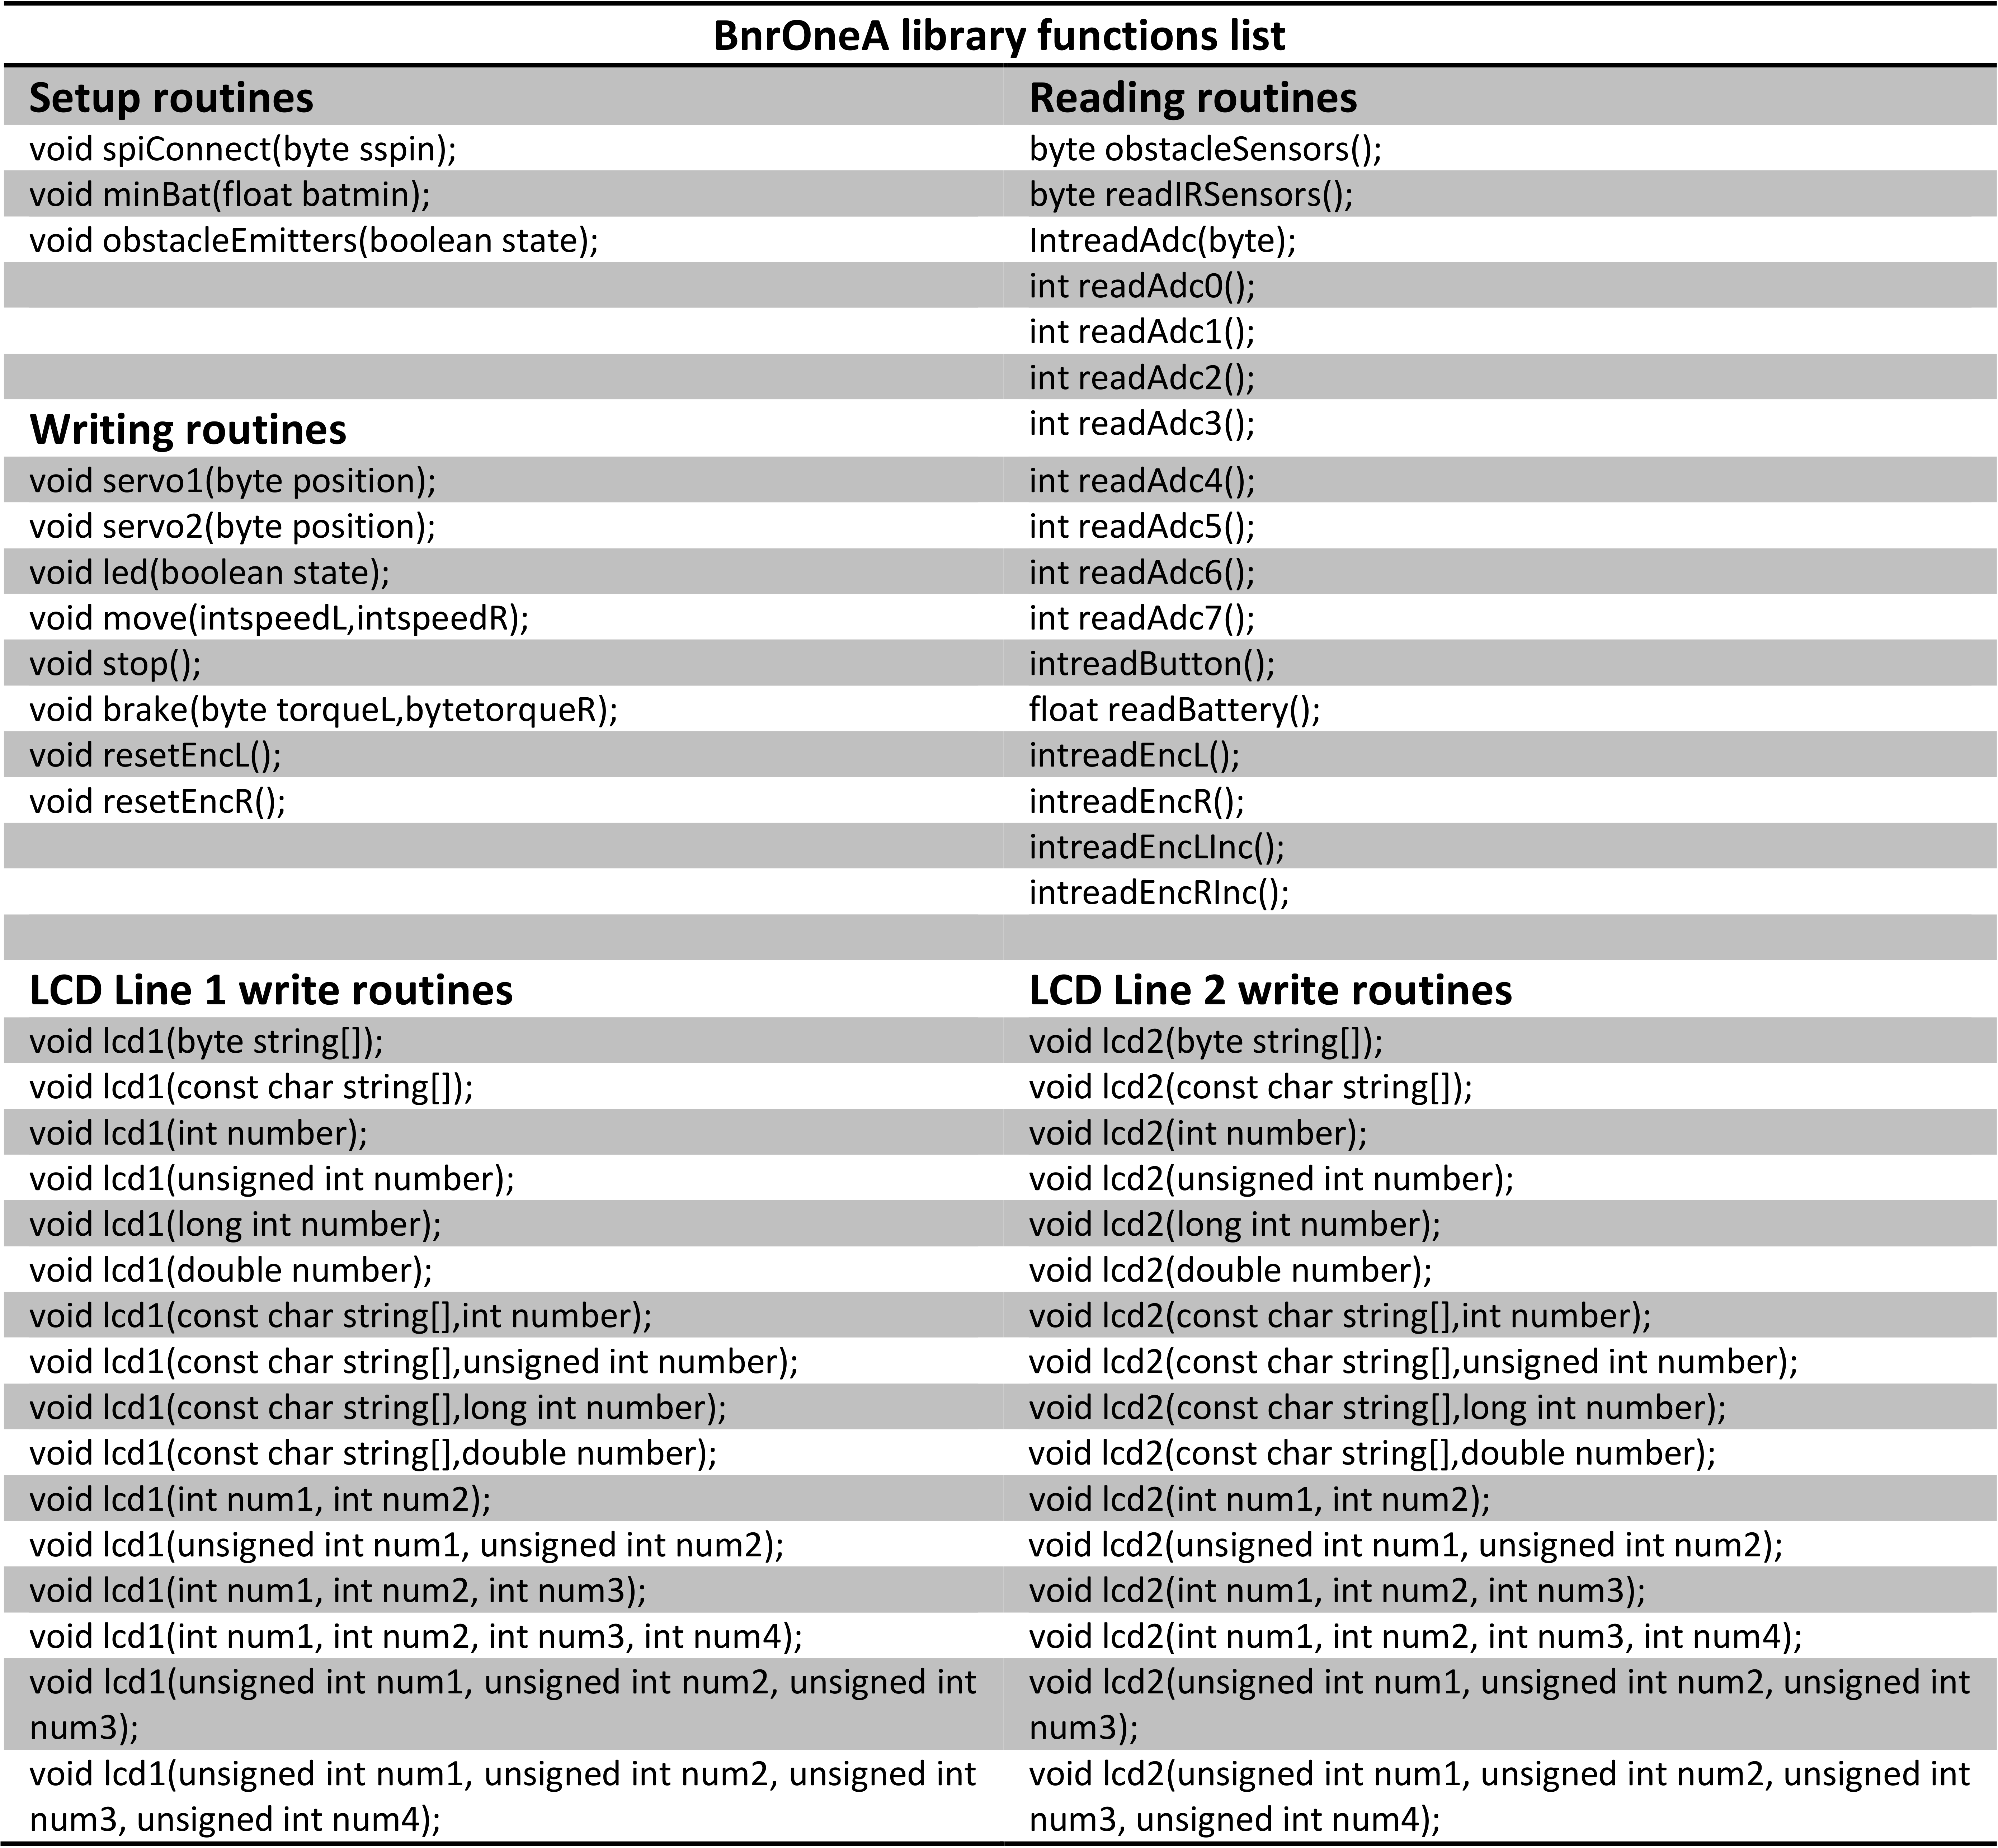
Here’s a list of the functions from the Bot’n Roll Library, for your convenience.

You can find all of these functions in BnrOneA.h.
led
void led(boolean state)
This turns on and off the LED, based on whether it is passed true or false. It works exactly as in ex01_LED, so look there if you want to use the LED.
lcd#
You already saw the lcd# function in the “Hello World” exercise on the robot.
As you can see from the functions list, the lcd# function takes a variety of different arguments, to allow you to use it in various ways. The library does not come with a method for formatting text, though, as you become more advanced in your C++ programming, you will probably find that you are able to format a string without the assistance of the various methods provided.
Setup Routines
spiConnect
void spiConnect(byte sspin);
This initializes the connection between the Arduino microcontroller and the PIC microcontroller on the robot.
There really is no reason that you are likely to want to change this code during the camp.
obstacleEmitters
void obstacleEmitters(boolean state)
This turns on and off the LEDs which are used for obstacle detection.
obstacleSensors
byte obstacleSensors()
obstacleSensors will return one of four values
| Value | Means |
|---|---|
| 0 | Neither sensor is activated |
| 1 | The left sensor is activated |
| 2 | The right sensor is activated |
| 3 | Both sensors are activated |
Additionally, when an obstacle sensor is activated, a corresponding LED will blink.
Exercise 4.2.1
- Start by copying the “empty” program from “Robot Programming Introduction” into your Arduino IDE, and saving it in a sensible place.
- Write a short program that will print “Left Sensor Activated” when the left sensor is activated, “Right Sensor Activated” when the right sensor is activated, and “Both Sensors Activated” when both sensors are activated on the LCD on the robot.
Exercise 4.2.2
- Add
obstacleEmitters(false)to thesetupfunction in your program, and run it again. - What happens?
Exercise 4.2.3
- Comment out
obstacleEmitters(false), and run it again. - What happens?
Exercise 4.2.4
- Uncomment
obstacleEmitters(false). - Change it to say
obstacleEmitters(true). - What happens?
Exercise 4.2.5
- Comment out
obstacleEmitters(true), and run it again. - What happens?
Next Step
Proceed to “Move The Robot”